Los centros de escucha multialumno son herramientas para mejorar las habilidades lingüísticas y de lectura en las aulas. Permiten que muchos estudiantes escuchen audio simultáneamente, lo cual es ideal para el aprendizaje en grupo. Esta guía te mostrará cómo configurar un buen centro de escucha y explicará por qué son útiles.
Puntos clave: Creación de un centro de escucha para múltiples estudiantes
- Elija auriculares resistentes y cómodos diseñados para las aulas.
- Elija reproductores de audio y jackboxes que puedan conectar varios auriculares
- Cree un lugar tranquilo en el aula para el centro de escucha.
- Elija un audio que se ajuste a lo que están aprendiendo los estudiantes
- Establecer reglas claras para el uso y cuidado del equipo.
- Sigue agregando audio nuevo para mantener interesados a los estudiantes.
- Utilice el centro para diferentes tipos de actividades de aprendizaje.
- Verifique cómo les está yendo a los estudiantes y cambie las cosas si es necesario
- Cuida bien el equipo para que dure más tiempo
- Utilice el centro para ayudar a diferentes tipos de estudiantes
Comprensión de los centros de escucha multi-estudiantes
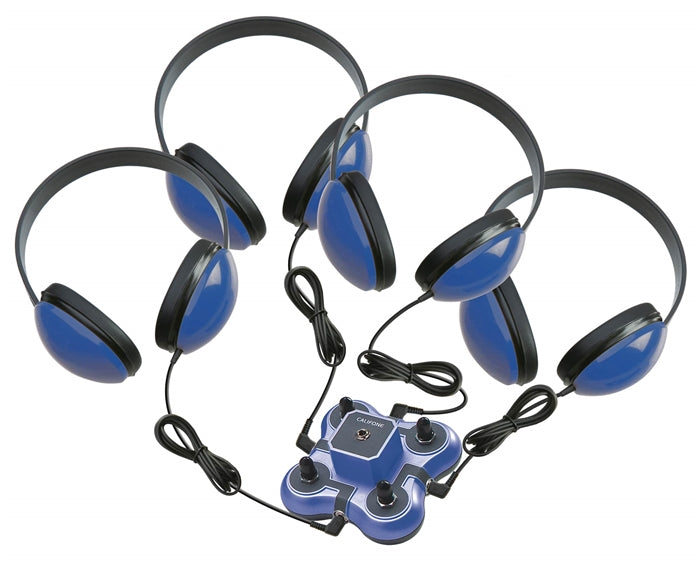
Un centro de escucha para varios estudiantes suele contar con auriculares, reproductores de audio y conectores que permiten que varios estudiantes se conecten a una misma fuente de audio. Estos centros ofrecen a todos los estudiantes la oportunidad de escuchar el mismo audio, lo que beneficia a diferentes tipos de estudiantes. Son especialmente útiles para quienes aprenden mejor escuchando y para quienes tienen dificultades con la lectura regular.

El uso de centros de escucha en las aulas tiene muchos beneficios:
Puntos clave: La escucha activa en la educación
- Escuchar activamente significa centrarse en comprender, no sólo en escuchar.
- Más del 60% de los malentendidos ocurren por mala escucha
- La gente normalmente sólo escucha al 25% de su capacidad máxima.
- Enseñar a escuchar activamente puede mejorar las habilidades de comunicación y lenguaje.
- Ayuda a limitar las distracciones y utilizar actividades que involucren múltiples sentidos.
- La escucha activa ayuda a los estudiantes a recordar la información y seguir mejor las lecciones.
- Puede hacer que los estudiantes se sientan menos frustrados, ansiosos y tristes.
- La escucha activa mejora la forma en que los estudiantes se relacionan con los demás y comprenden los sentimientos.
- Los profesores pueden demostrar que saben escuchar organizando reuniones de clase periódicas.
- Juegos como la escucha atenta y la búsqueda del tesoro de sonidos pueden enseñar a escuchar activamente.
Componentes esenciales de un centro de escucha
Antes de configurar su centro de escucha, es importante conocer las partes principales y qué hacen:
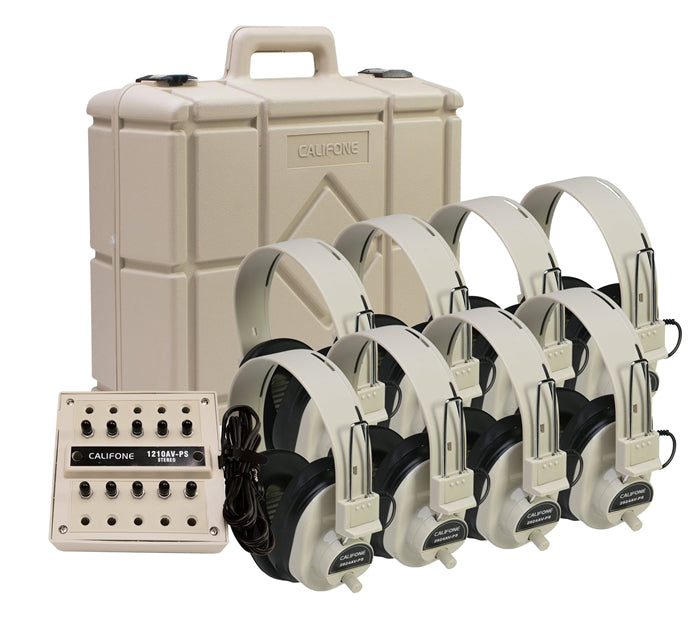
- Auriculares: Elige auriculares resistentes y cómodos, diseñados para el aula. Busca unos con bandas ajustables, almohadillas suaves y cables que no se enreden. Echa un vistazo a nuestros auriculares para el aula. para encontrar los adecuados para sus estudiantes.
- Reproductores de audio: Podría ser un reproductor de CD, un reproductor de MP3 o incluso una computadora o tableta. Piensa en el tipo de audio que tienes y lo fácil que es usarlo para profesores y alumnos.
- Cajas de jack: Permiten conectar varios auriculares a una misma fuente de audio. Suelen tener capacidad para entre 4 y 8 auriculares cada uno.
- Contenido de audio: CD educativos, audiolibros o archivos de audio digitales. Hay diferentes tipos para distintos grados y asignaturas.
- Soluciones de almacenamiento: Un buen almacenamiento mantiene todo organizado y seguro. Piensa en cajas o carritos diseñados específicamente para centros de escucha.


Paso 1: Elegir el equipo adecuado
Al elegir el equipo para su centro de escucha, piense en lo siguiente:
- ¿Cuántos estudiantes lo usarán a la vez? Esto te ayudará a saber cuántos auriculares y qué tan grande es el jack que necesitas.
- ¿Qué tan resistentes son los auriculares? Busca unos con cables resistentes, una construcción robusta y buenas garantías.
- ¿Qué tipo de reproductor de audio funciona mejor (CD, MP3 o Bluetooth)? Piensa en el audio que ya tienes y en lo que podrías usar en el futuro.
- ¿Cómo guardarás el equipo cuando no lo uses? Un buen almacenamiento mantiene las cosas organizadas y prolonga su vida útil.
- ¿Cuánto dinero puedes gastar? A menudo es mejor comprar cosas de buena calidad y duraderas, aunque al principio cuesten más.
- ¿Funcionará con la tecnología que ya tienes en el aula? Asegúrate de que todo funcione en conjunto.
Nuestro centro de escucha para 6 personas con Bluetooth Es una excelente opción porque es fácil de usar y funciona con tipos de audio antiguos y nuevos.
Paso 2: Configuración del espacio físico
Es fundamental crear un área especial para escuchar en el aula. Aquí te explicamos cómo hacerlo bien:
- Elige un rincón tranquilo del aula para evitar distracciones. Si puedes, usa estanterías o separadores para crear un espacio semiprivado.
- Prepare asientos cómodos para los estudiantes, como cojines o sillas pequeñas. Asegúrese de que sean adecuados para su edad y les permitan sentarse erguidos mientras escuchan.
- Coloque una mesa o estante para el reproductor de audio y el jackbox. Facilite el acceso a los estudiantes.
- Mantenga los cables ordenados para evitar tropiezos y daños. Use pinzas o cubiertas para mantener los cables a lo largo de las paredes o debajo de las alfombras.
- Use una caja o carrito de almacenamiento para mantener el equipo organizado cuando no lo use. Esto facilita su instalación y almacenamiento.
- Haga que el espacio se vea agradable con carteles o arte que fomente la escucha y la lectura.
- Agregue una pequeña pizarra o tablero de anuncios para instrucciones, horarios o preguntas sobre el audio.
Paso 3: Conexión del equipo
Ahora es el momento de conectar todo:
- Coloque el reproductor de audio sobre una mesa o estante. Asegúrese de que esté cerca de una toma de corriente si es necesario.
- Conecte el jackbox al reproductor de audio con el cable correcto (normalmente un cable de audio de 3,5 mm). Asegúrese de que esté bien conectado.
- Conecte los auriculares al conector jack. Si usa más de un conector jack, conéctelos en línea.
- Prueba todo reproduciendo audio y revisando cada par de auriculares. Ajusta el volumen para que sea cómodo para todos.
- Etiquete cada auricular y su enchufe para facilitar su identificación y evitar que se enreden.
- Si utiliza auriculares inalámbricos, asegúrese de que el transmisor esté conectado a la fuente de audio y que todos los auriculares estén cargados y funcionando.
Para grupos más grandes o mayor flexibilidad, considere Nuestro centro de escucha inalámbrico de 12 estacionesNo necesita un cableado complicado y permite que los estudiantes se muevan más en el aula.
Paso 4: Organización del contenido de audio
Tener un contenido de audio bien organizado es fundamental. Aquí tienes algunos consejos:
- Haz una lista de todos tus materiales de audio, incluyendo títulos, temas, grados y duración. Puedes usar una hoja de cálculo o un programa de biblioteca para facilitar la actualización y la búsqueda.
- Etiqueta claramente los CD o archivos digitales. Puedes usar colores o símbolos para indicar diferentes temas o niveles de lectura.
- Guarde los CD en fundas protectoras para mantenerlos seguros. Use fundas o cajas para CD que los protejan de arañazos y polvo.
- Para los archivos digitales, crea carpetas en tu computadora o tableta que sean fáciles de navegar. Organízalas por materia, grado o tema de estudio.
- Sigue añadiendo audio nuevo para mantener el interés de los estudiantes. Puedes suscribirte a servicios de audio educativos para recibir contenido nuevo con regularidad.
- Incluya diferentes tipos de audio, como historias, no ficción, poesía y música, para que coincidan con diferentes intereses y objetivos de aprendizaje.
- Crea listas de reproducción que vayan con lo que estás enseñando en clase.
- Permita que los estudiantes sugieran nuevo contenido de audio para mantenerlos interesados en el centro de escucha.
Paso 5: Implementación de los procedimientos del aula
Establezca reglas claras para el uso del centro de escucha para mantenerlo funcionando bien:
- Crea un horario para que los diferentes estudiantes usen el centro de escucha. Puedes incluirlo en tus rotaciones habituales de lectura o en el centro.
- Enseñe a los estudiantes a usar y cuidar el equipo. Muéstreles cómo ponerse los auriculares, ajustar el volumen y manipular CD o dispositivos digitales.
- Establezca reglas de comportamiento al usar el centro, como hablar en voz baja y respetar el tiempo de escucha de los demás. Coloque estas reglas cerca del área de escucha.
- Ofrecer una forma para que los estudiantes reporten problemas con el equipo. Esto podría ser una simple hoja de registro o un trabajo de "ayudante técnico" para estudiantes.
- Limpie y desinfecte los auriculares con regularidad. Enseñe a los estudiantes a limpiarlos después de cada uso.
- Si los estudiantes pueden usar materiales de audio por su cuenta, establezca un sistema para prestarlos.
- Hacer una guía para solucionar problemas comunes, para que los estudiantes puedan resolver pequeños problemas por sí mismos.
- Decide qué sucede si los estudiantes hacen mal uso del equipo o no siguen las reglas.
Mantenimiento y solución de problemas
Cuidar regularmente su centro auditivo garantizará que funcione bien durante más tiempo:
- Revise todas las conexiones semanalmente para asegurarse de que estén bien sujetas. Busque cables y enchufes dañados.
- Limpie las almohadillas de los auriculares y las superficies del reproductor de audio con regularidad. Preste especial atención a las superficies compartidas para evitar la propagación de gérmenes.
- Reemplace las baterías de los dispositivos inalámbricos según sea necesario. Tenga baterías de repuesto a mano.
- Solucione cualquier problema de calidad de sonido rápidamente. Esto podría implicar ajustar la configuración, reemplazar cables o reparar el equipo.
- Realice una limpieza profunda de todo el equipo mensualmente, lo que incluye desinfectar los auriculares y limpiar todas las superficies.
- Haga que el departamento de TI de su escuela o un técnico revise todo una vez al año para asegurarse de que todo funciona bien.
- Guarde piezas de repuesto como almohadillas para los oídos y cables de audio para reemplazos rápidos cuando sea necesario.
Para un fácil mantenimiento y una buena calidad de sonido, considere Nuestro centro de escucha de MP3/CD/casete USB de lujo, que puede reproducir diferentes tipos de audio y está diseñado para durar.
Mejorar el aprendizaje con centros de escucha
Para aprovechar al máximo su centro de escucha para múltiples estudiantes y utilizarlo bien en su enseñanza:
- Adapte el contenido de audio a lo que enseña en clase. Cree guías de escucha o fichas de trabajo que conecten el audio con los objetivos de la lección.
- Utilice el centro para diferentes tipos de instrucción, proporcionando contenido en varios niveles para ayudar a todos los estudiantes.
- Incluya actividades de escucha en estaciones o centros de lectura. Cree tareas de seguimiento que mejoren la comprensión y el pensamiento.
- Cree actividades o debates basados en el contenido de audio. Pueden ser propuestas de escritura, charlas grupales o proyectos creativos inspirados en lo que escucharon los estudiantes.
- Monitoree el progreso de los estudiantes y modifique el contenido o el uso si es necesario. Use hojas o herramientas digitales para registrar los materiales que han terminado y verificar su comprensión.
- Incentive a los estudiantes a trabajar juntos asignándoles compañeros de escucha o grupos pequeños para discutir el contenido de audio.
- Utilice el centro de escucha para ayudar a los estudiantes a aprender inglés proporcionándoles audio tanto en su primer idioma como en inglés.
- Utilice tecnología como códigos QR vinculados a archivos de audio digitales, para que los estudiantes puedan acceder al contenido en tabletas o teléfonos inteligentes.
- Enseñe estrategias de comprensión auditiva, como tomar notas, visualizar o resumir lo que escuchan.
Conclusión
Crear un centro de escucha multiestudiante es una excelente manera de ayudarles a aprender mejor. Puede mejorar sus habilidades lingüísticas, su comprensión lectora y su interés por aprender. Al elegir cuidadosamente el equipo, organizar el espacio y establecer reglas claras, puede crear una herramienta eficaz para el desarrollo de las habilidades lingüísticas y lectoras. Recuerde cuidar su equipo, añadir nuevo contenido de audio y adaptar su enfoque según las necesidades y comentarios de sus estudiantes.
Un centro de escucha bien utilizado ayuda a diferentes tipos de estudiantes, facilita la enseñanza de diferentes niveles en una misma aula y ofrece a los estudiantes la oportunidad de aprender de forma independiente y en grupo. A medida que la tecnología evoluciona, procure mantenerse al día con las nuevas herramientas y métodos de aprendizaje de audio para que su centro de escucha esté actualizado y sea útil en el aula.
Para todas sus necesidades de centro de escucha, desde auriculares hasta configuraciones completas, Conozca nuestras soluciones de centro de escuchaCon el equipo y el enfoque adecuados, su centro de escucha multi-alumno se convertirá en una parte valiosa de su aula, ayudando a los estudiantes a amar la lectura, mejorar sus habilidades lingüísticas y obtener mejores resultados en todas las materias.


